Posts

Showing posts from March, 2022

Day 9: Finally Finished (Isaak)

Image
 The day started with me using steel wool on my board and its frame to get rid of excess gunk after that I put the final coat of finishing, after the last stroke a great feeling of accomplishment came over me. I moved on to the checker pieces. Once I found out that there was an easier way to trace the symbols of the pieces the work went much faster. I then wanted to make sure that the symbols would fit and look good on the circular pieces I made circles on the software and put the symbols on top till it looked good. Then after realizing that the circles were actually less than an inch by a little less than 0.04 inches, I had to do a redesign, I only had to shrink the symbols a little, then centered them with the laser and started to engrave. During this process I messed up by using a purple heart circle for the king instead of my planed padauk circle easy fix I just made the king and queen on the opposite color out of padauk. I applied finisher on them and my work here is done and I am

Day 9: Finished? (Nate Savarese)

Image
  My Cabinet Yesterday Today was mostly finishing touches. I started the day off by power sanding everything except the legs with 150 grit sandpaper. This took up most of the morning Because I had to make sure that I was being thorough and sanding everything evenly. For the remainder of the morning, I sanded the legs by hand. This was very annoying because my hand kept on cramping from the position that I was holding the paper. After lunch, I started by repeating that process but with 220 grit sandpaper. This made the wood a lot smoother. I then attached the legs to the wood and evened them out so the wood would stay sturdy and not be wobbly. Then I used a piece of cloth and a beeswax finish mixture to give the wood dark natural walnut color. My Cabinet Today

Day Eight: Woodworking Complete (Aiden)

Image
 Day Eight: Woodworking Complete With all of my woodworking completed yesterday, all I had left to do was finishing touches and extra features. I started by sanding the piece down and making any rough edges or imperfections smooth, but it started raining before I was done so I didn't get to finish. Stuck inside because of the rain, I got to work hot-gluing the LEDs onto my lamp piece. My original plan was to have the LEDs only on the bottom part of the lamp, but since I still had multiple feet of LED string left that would otherwise go to waste, I decided to also add it to the top piece and connect the two with a cool wire-coil design in the center. I finished that design right before lunch. The lighting on my lamp piece      After lunch the rain had mostly stopped, so Mr. Grisbee set up a temporary table for me using some sawhorses and I started work again. I ran the router over it to round the edges and give it a more connected look. Once that was done, I sanded it twice more wit

Day 8: house on legs (Nate Savarese )

Image
Almost finished house on legs Today, I made the legs for the table, and finally sorted out the inside of my circles. In the morning, I used a sandpaper bit on the Dremel to get all of the super glued veneers out of the inside of my circles. I replaced the circles with dark black paint, when the paint dried, it kind of looked like the wood was burnt into charcoal but it also gave it a really cool look. For the legs, I got three pieces of walnut wood and trimmed them down to how I wanted them to be. I then got two really thick pieces of scrap walnut that I used to cut out the peg legs. for the peg legs, I trimmed them to a block, then did an angled cut to make a taper on the leg. then I used the router to round the edges of the legs to make them more smooth and look better. Next, I screwed the legs and boards together to make a rectangle using the pocket hole technique to make the screws sturdy. I did mess up with the screws multiple times by cracking the wood, screwing too far to have t

Day 8: Board completion (Isaak)

Image
 After a week and a half of work I could see the end I started by sanding the bottom of the board and its frame for the final time, it gave me much satisfaction knowing this would be my last time sanding. Using the skills from the past week I sanded without a problem smoothed out all the surfaces and made them soft to thee touch. After the sanding was complete all I had to do was dust off the board and apply the finisher. It turns out the finisher I used was edible not that one would eat it but in theory you could. I had to go over my piece once with finisher and one more time with a clean rag to clean up all the globs. The curiosity of how much darker the woods would get after the finisher was something that I had been curious about from the start, I found out that the cherry wood I got was from a light colored cherry tree the wood was much lighter than what I had expected, however it is a good thing, it was able to give the board the contrast from light to dark much like a checkerboa

Day 7: The Frame (Isaak)

Image
 In the morning I finished making my frame pieces and realized something, I messed up. I cut off the corners of the wood so when I needed to find the center of it it became very difficult. I made this mistake yesterday and I should have had the foresight based on that to not do that however I didn't so I resulted to using my previous frame to line it up with the router bit. After that I took great care in cutting the pieces to 45 degrees. I did not want a repeat of yesterday. My heart pounding on each cut until it was done and the fame fit together without any of the pieces being too short even barely. I proceeded to glue the frame to the board I used wood glue this time and held it together with a band clamp. After that I waited for 3 hours until I could take the clamp off. I sanded relived that the frame actually fit this time.

Day 7: The glue up

Image
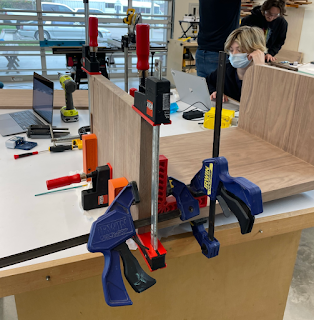
  Clamps holding glue together Today wad a very pivotal day for me, this is because I went from a lot of random boards and pieces of wood, to a whole dog house. I started this morning with finishing my top dowels. Dowels need to go on the top and bottom of every piece for structural integrity. Right before lunch, I was finally able to start gluing all the edges together, and clamping them down. After lunch there was not much that I could do because my build needed to stay still, but the circles on the front were not obstructed by anything so I was able to start super gluing the veneer to the insides of them. This was not that easy of a process because I kept gluing my fingers together and had to rinse them in solvent for a really long time. After I finished all the veneer, I decided that it looked terrible and started the long hard process of undoing superglue. This took me to the end of the day of trying to find as many techniques as I can to get rid of it. 

Day Seven: Finishing The Old, Starting The New (Aiden)

Image
 Day Seven: Finishing The Old, Starting The New      With all the pieces of my bedside table fully prepared and ready to be glued, I finally got to start my second project. I came in the morning and got right to work gluing up the pieces of my bedside table, starting with the top. I had a few changes to make to the sides and bottom of the top part before I glued them on, but I had plenty of time to make those while the top was drying. We had a small clamp shortage around the time I finally got to glue up the sides of my bedside table, because Nate was also gluing his dog-house up, but eventually I got to get everything but the bottom of the top part glued and drying before lunch. My wood drying after being glued up       Once we got back from a surprisingly long lunch, I got right to work gluing on the bottom of the top part, and with that finished in around a half hour, I was done with the bedside table until the next day. Faced with a few hours of free time, I started the project I h

Day Six: The First Connection (Aiden)

Image
 Day Six: The First Connection (Aiden)      Today was the day I got to finally got to start putting the pieces of my project together like legos. I started the day by making a few final touches on my pieces of wood, which included sanding, small final cuts, rounding the edges of the base, and getting everything organized and ready to be put together. Once I finished with getting all the individual pieces to look like I wanted, I got to work on making a grove on the top peice of the table that will fit my phone. It took me a while to set up borders for my router so I could get a perfect grove, but in the end it works really well and I'm glad that not only does it look good, but it will also keep my phone from falling off the desk in the middle of the night, something that annoyed me greatly. With that grove finished, we headed to lunch.     After lunch, I got to work using a guide to drill four holes, two on the back board and two on the foot board, each five inches from the edge.

Day 4: A Little Behind (Harper)

Image
A little Behind      I was excited to be back for day four. I was ready to start cutting and gluing my project together. I didn’t realize it when we were buying would, but my plan was designed to use 1-inch thick wood, and I didn’t realize that we had bought 3/4 inch wood at the store. When I realized, I was not mad but just disappointed that I couldn’t start my day off by cutting and gluing. I didn’t realize before I started designing again that changing wood to 3/4 of an inch instead of 1 inch is actually much more complicated than it sounds. When redesigning, I discovered other significant flaws in my design that would not affect the structure but the practicality of the design. I realized my project, a coaster holder with a tiny drawer that clamps onto the side of my couch, was way too big. It was going to be over 10 inches long and 12 inches tall. It just never came to mind that that might be too chunky and big to be on the arm of my couch. So I started designing from the beginnin

Harper: Seven Warehouses (Day 3)

Image
 The Seven Wherehouses Today was the first big day of the woodworking course. We had all finalized their budgets, and we were ready to go and buy the wood. We started the morning by handing in our permission slips to leave to go to the warehouse where they sell wood. The warehouse was called Clarks, and I didn’t know where it was until we got there, so I was a little lost, but I was extremely shocked at how big it was when we got to the warehouse. They had seven different warehouses, all with different kinds of wood from all over the world. We met an employee at Clark’s, and he showed us around after we presented what we needed for our woodworking projects. For my project, I did not need a lot of wood, and I ended up sharing a large wood board with Nate. Nate and I shopping list was pretty basic, unlike Aiden‘s in Isaak’s. Because Isaac and Aiden were in warehouse seven looking at all the different versions of walnut wood, Nate and I got to explore the different warehouses on the prope

Day Five: Touch-up Cuts: The Dedo Stack (Aiden)

Image
 Day Five: Touch-up Cuts: The Dedo Stack (Aiden)      I spent today doing final cuts and touch-ups on my wood, getting it ready to be glued and turned into a bedside table. I spent the first half of the day cutting eighths, sixteenths, or even thirty-seconds of an inch off of my wood to get it to the perfect size. Right before lunch, I realized that the peice of wood that was to be the base of my bedside table wasn't flat, so Mr. Grisbee helped me put it on a sled that would allow us to move it through the plainer in order to make it flat. While we were able to make the wood flat, running the wood against it's grain through the plainer made the shavings come off in long slivers, which we would soon realized clogged nearly everything we used to clean them up.     After lunch I needed to make some dados in my wood, which are small cuts in the wood that normally would act as good bottom joints in a box or shelf, but which I wanted to use to make the top slightly more stable and ha

Day 5: #Productive (Harper)

Image
  #Productive Today I feel like I have made a lot of progress! I can’t believe it’s already Friday; this week has gone by so fast. Today I finished cutting all of my wood from the big board that we got on Wednesday. The process of cutting the big pieces was very interesting. You can use many attachments on the table saw, and I feel like I used every single one. I found the table saw to be very difficult even though I’ve done it before in the design technology course. I messed up a lot more than I would have liked to because I wasn’t measuring right, or I wasn’t at the right angle when I was cutting, which was very difficult. After I finished cutting, I learned how to make a miter joint, a particular type of joint that you can cut to make two pieces of wood intersect much nicer. The miter joint works by having two different pieces of wood, both pieces of wood have a 45° cut on the ends. The boards are then merged together to form a perfect 90° angle which looks very slim and professiona

Day 6: DOWELS (Nate Savarese)

Image
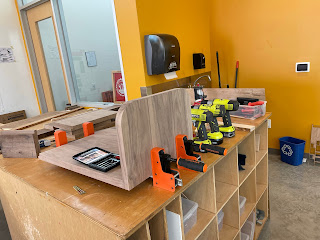
Today I did one thing and one thing only, Made dowels into my wood. Dowels are used to make the wood structurally stronger and more stable, or they can just be used as a guide for gluing. I used a simple five-step process. First, I lined up my wood to where I ideally wanted it to be once the structure is finished. Then I adjusted the length of the drill bit accordingly. Then I clamped all of the wood and utilities together so that the vibrations of the drill would not mess me up. Then the fun part, I drilled the holes. Then finally I put the dowel into the hole. Then repeat this about 16 times and I was done. Only 16 more to go tomorrow. Dowel

Day 6: Restarting (Isaak)

Image
 The morning started with me using the router to finish up my frames aesthetics. After sanding the bottom and sides of my boards which took a while because of the unevenness, after that is had to cut out my base for the board to go on, I cut the base exactly the dimensions of the board, unfortunately that was a mistake I didn't allow enough room for my frame. After re-cutting my base I started to work on my frame this process seemed quick at first however I cut my first piece to short barely a 1/32 of an inch and that made the rest of the frame pieces not be able to connect well and left a huge gap at one of the corners so I ended up having to recut the frame pieces  and will continue that tomorrow then if I am able to finish that without messing up I will most likely be able to put the finishing oil on my piece. This is the frame with the one piece that was barely too short. 

Day 5: Getting somewhere (Nate Savarese)

Image
  Me drilling my holes Today in woodworking, I made a lot of new progress. on my wood. I started by resetting my drilling setup so I could finish the rest of the holes. These holes were a lot easier to make today because I had the experience. It took the first half of the morning to finish them and I did it without overheating the drill. After that, Mr. Grisbee thought me how to iron on hot edge banding. I then started doing that, took a lunch break, then finished all of the edge bandings. After I finished, I used a razor blade to trim it to how I wanted. Then I started to map out the holes for my dowels. Today was very fun because I learned a lot of new skills like ironing edge banging and how to find locations for dowels.

Day Two: The Table That Turned Into A Coaster. (Harper)

Image
 The Table That Turned Into A Coaster Today I kept brainstorming and designing for my bedside table. I found outstanding inspiration photos, and I felt like I had an excellent understanding of what I would build. I started drawing what I wanted to design. I was so excited today designing and drawing on paper and on the computer the exact measurements of what my table should look like. The sketch I made was very impressive; I was so proud of myself for drawing with elaborate detail. Towards the end of the class, it was suggested that I did not have enough experience to create the piece, and although I worked hard, I realized that since this was my first woodworking project, it was not a wise idea. I had worked so hard designing. So I restarted the process with my instructor, and we ultimately decided on a coaster with a drawer that would clap onto my couch. The table is going to have a drawer in the middle to store remotes for the television! A lthough I was upset, I am glad that I deci

Day 5: The Sanding, The Scrubbing and The Epoxy (Isaak)

Image
 Coming in to this day with my wood all cut and glued together and knowing what to do but not how to do it brought a sense of a finale however I was dead wrong. The epoxy that I used to hold the tiles together got on the top of the tiles making the finisher highlight the spills and would make my piece look bad so, I couldn't let that happen. So I started off with sanding the spills, I chose a more course sand paper to hopefully get rid of the epoxy I eventually mixed it with a glue/epoxy remover chemical and that was working better...so I went with a different approach using the dremil at first when combined with the remover was working well very well however if I wasn't careful it would burn the wood and was hard to reach in the corners between tiles because I chose to have the board slope. It is still not done and needs to be worked on but it is a lot better than this morning.  The cube next to the board is a piece of cherry with the epoxy on it without sanding or scrubbing a

Day 4: The Real Work (Isaak)

Image
Right from the start the moment we came in we could get started on our projects. I had to plan out my design of my project a little bit further, things such as the saws cutting off an extra eighth of an inch was a lot more prevalent in my mind with the planning. I had to cut long strips of wood, I thought of using the sliding board with the saw fence. That was a bad idea because I wouldn't be using something to push the wood though so there could be "kick back" that's when the piece of wood that you cut off is too small so it can shoot back behind you so I ended up just doing it with the saw fence and a pusher without the sliding board. After I cut the wood I had an extra strip of cherry that was a happy accident because I was able to test on that spare wood, that was helpful when I messed up when I was cutting out my first checker board tile. After that I glued the tiles together I had a rudimentary board that needed the glue to be cleaned off of it. 

Day 4: Trial and error (Nate Savarese)

Image
Today was one of my busiest days yet. The day started when I wanted to put together my pieces without glue to get an idea of what my finished build would look like. I  am really glad I did this because I learned two very important things. The first one, is that some of my boards were crooked. I fixed this by using the table saw to saw off less than 1/4 of an inch from the sides so I could keep the size of the wood and have the shape that I wanted. The second problem, was that I made my sides too big. I forgot to count for the space that the back and front take up, so they were jutting out of the front of the box. I then cut these down to what I wanted to fix that problem. Then, I looked for inspiration for a design for my front panel to make my box look better, and so a little bit of light would be let into the box. My first idea was to cut hexagons into the wood using a laser cutter. But when we tried a test piece of wood. We learned that instead of cutting a clean hexagon. The laser

Day Four: It's all coming together (Aiden)

Image
Day Four: It's all coming together     Today was our first full day to work with our wood and really get some good progress on our designs. When I came in the door, I already had my wood ready to cut and marked out, so I got straight to cutting the wood into the various pieces I would need. Since the bedside table was designed to be one and a half feet in width but we purchased half-foot wide boards, I had to make three separate but nearly identical pieces for each of the five main parts of my build. As you can probably expect, that turned to be a lot of wood to cut and refine, and it ended up taking me most of the day to complete, up until about two in the afternoon. Despite taking a while, it was oddly satisfying to just be able to set the table-saw's fence to one position or the plainer to one height and cut six two-foot-long boards all at once.     Once the wood was all cut and ready, I started the process of gluing all the wood together to make the one and a half-foot wide

Day Three: The Beginning (Aiden)

Image
Day Three: The Beginning     Today, our two days of planning and preparing would be put to use and we would start working with the wood that would eventually become our projects. We started the day by going to a lumber shop in the heights by the name of Clark's to pick out the wood we would need, a place that honestly impressed me with the amount and different types of wood that spanned it's eight separate warehouses. While we were there we also got to visit their mill, where we got to take a look at all the different types of machinery and techniques used in professional milling and woodworking, which was a good chance for us to to learn a little more about what Mr. Grisbee taught us at the start of the course. I feel like I learned a lot more about how woodworking is done by professionals, as well as the sheer scale and types of tools they use, which was one thing I had never done any research into before aside from the first day of this A-term.     After we got to visit t

Day 1: The Three Machines (Harper)

Image
The First Day Today I learned about the process of how a tree can turn into a two by four. The way the wood board is cut determines the long-term strength of the wood and how it will warp in the future. After the lesson on wood processing, we were able to cut a piece of wood using three different machines. The machines used were a table saw, a plainer, and a jointer. The first machine we used was the jointer, as seen in the photo above. The jointer was very loud and scary to use; I was not a big fan. The machine can de-finger you very quickly. I also used the plainer machine that you can use to make wood thinner. And the last machine used was the table saw to cut the final product to size. When I started brainstorming, Mr. Grisbee and I talked about what defined a wood "plank" and how the "correct" way to say it was a wood board. I also started brainstorming what I wanted to work on. I decided to make a simple bedside table with black wood stain, and I cannot wait t

Day 3:buying and cutting our wood (Nate Savarese)

Image
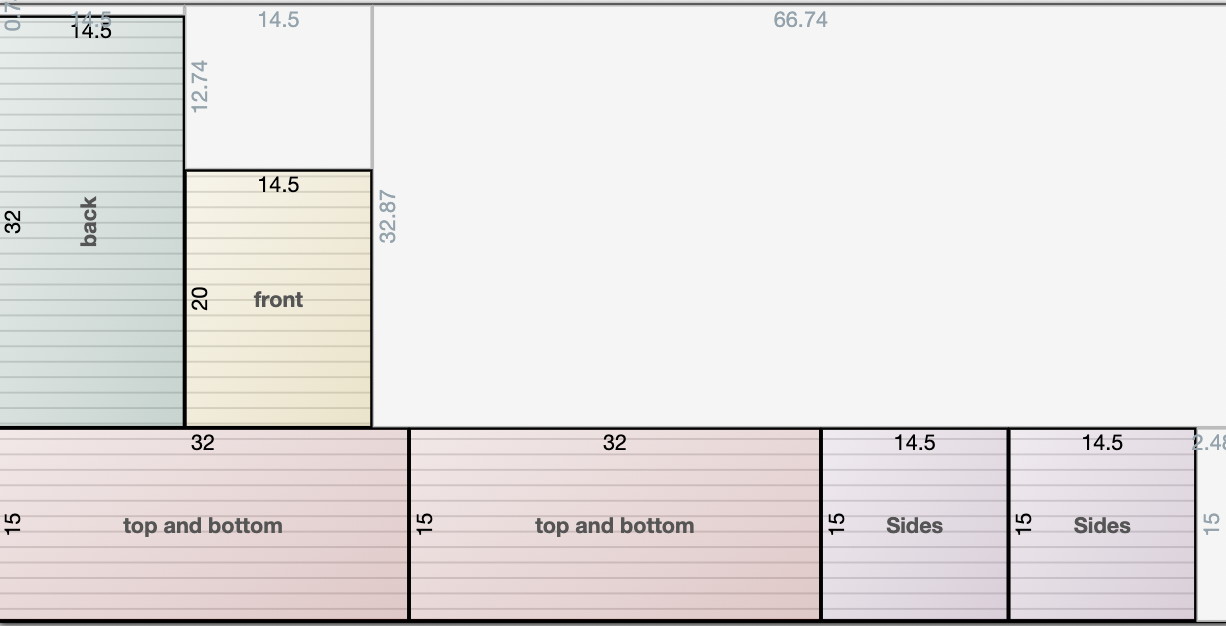
 Today was a very eventful day in La Tinkeria, We started by finalizing our design plans and heading to Clarks lumber CO to purchase all the wood and materials that we will need for our projects. When we got to the lumber mill and looked at a lot of wood, then we picked ours out. Then we toured the mill inside the store to learn about the process of making raw wood into lumber. We got back at lunch. After this, we could finally start making our projects and I was able to cut out all of the pieces that I needed for my Dog House. Tomorrow I plan to start joining my pieces together to take them from random wood pieces into an actual building. Today I was happy to learn about the mill process, what it is like to be a mill worker, and all about the different shapes, sizes, and species of wood. This is my cut list/plans for my house

Day 3: Milling And Cutting Our Own Boards (Isaak)

Image
 The first part of our day we spent at the wood shop, where there was a lot of wood not just in shear quantity but a large variation in the species of wood. There a lot of time was spent deciding on the boards we needed. Even though we had picked out what we had needed it is a raw lumber shop so nothing there is exact some boards were too long while others were too thin or skinny, so compromises and changes had to happen on the fly. For myself I needed cherry but the shop only had 8 feet and longer boards of cherry and I only needed a maximum of 4 feet so we chose to not do raw cherry but milled to make it more cost effective. Once back we unloaded and started to cut our boards this time we were not given specific paramitas for how and what to do we had to decided that on our own and cut it on our own. We made good progress with the cutting but there is still work left to tomorrow.  These are some of the boards I cut.

Day Two: Planning (Aiden)

Image
 Day Two: Planning      We spent today planning our projects and what we would do for the rest of the A-term. Because of the flooding, today was a late day and we started at 10:00am, but we got to work as soon as we came in the door. I had already planned a bit of what I wanted my project to look like the previous night, which was a bedside table custom designed for my needs, but I still had far to go in terms of planning what I wanted to purchase and how I was going to put the table together. We spent the rest of the day until about 2:00pm planning for our projects, and eventually I decided that me and Isaak would join our budgets to purchase two 8-foot walnut boards and another thinner 4-foot walnut board, which would be more then plenty for the both of us.    3-D model of my bedside table design for planning      While we were planning our purchase lists, we actually had to learn quite a bit about different types of wood and the way it's listed and priced on a catalogue. Persona